I began all the exercise with A4 printer paper. I first had to invest in a decent cutting knife, I tried using the one I had but instead of cutting it just tore the paper and using scissors created large holes or unwanted creases.
After completing all the exercises with printer paper I moved onto different types of papers, using different thicknesses of paper. From delicate clear cellophane and newspaper, to more rigid black card and water colour paper. What I found was the more delicate the more difficult it became to hold cuts into shape, like the clear cellophane which held no shape at all. And the more rigid papers such as the brown card. Which instead bending into a curve, it folded instead which was not easy to manipulate or aesthetically pleasing either. The more successful papers to use were the papers like tracing paper, which had enough firmness to hold a good shape but not to rigid to didn't bend to show the cuts.
The other thing I needed to take into account was the cutting exercise I was using the paper for. For example the brown parcel paper would not have worked well for exercise 1 but worked really well for exercise 2 as it the more floppy nature of the paper lended itself well to the cutting. This was also true for the paper size I chose to use, smaller sized paper left a smaller surface to manipulate where as a larger surface left room for movement within the paper. It all came down to the exercise as to which size and thickness of paper worked the best and adapting the material to the exercise.
Exercise 1 Cutting central space
Exercise 2 Cutting edges
Exercise 3 A Meandering Cut
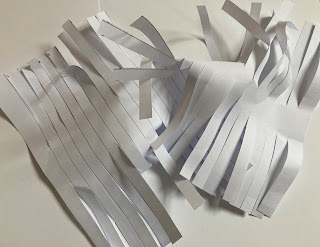
Cutting different papers created different papers. Observing that depending on thickness of the paper created a different pattern. From the floppy tracing paper creating soft curved edges to the rigid card standing in a row, or folded out like a staircase. The stronger paper created more interesting designs as the paper was easier to manipulate into different patterns.
Exercise 4 Cutting Holes
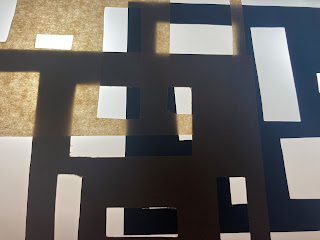
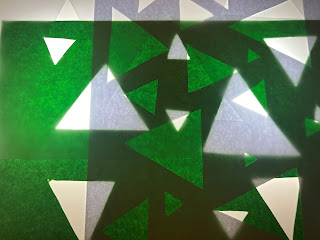
Using a selection of different papers in varying sizes to cut out a rectangular shape. Using three sheets of either A3,A4 and A5. Then layering the different paper thicknesses and colours over each other. Making the cut shapes in no particular pattern as I did not want the holes to line up.
I decided to invest in a light box, with the idea that the light shining through to show the hole through all the different layers. This worked out a lot better than I could have imagined. The rectangles remind me of a city scape, with high rise buildings. And the circles resemble the bubble within a lava lamp, the use of coloured paper helped to add to the effect.
After the previous samples, I remembered a piece I had seen during my research by Panchamia (as pictured below) and set about recreating my version of the piece in paper. Taking sheets of tracing paper and cutting squares into the sheets. With the light shining through the layers of paper added a visually interesting quality to the piece creating different tones of grey and interesting patterns.
https://www.textilecurator.com/home-default/home-2-2/deepa-panchamia/
Exercise 5 Creating flaps
I tackled this exercise by choosing a selection of papers in different sizes. I then created a series of flaps on the sheets large flaps, small flaps, multiple and sparse. Again the flaps were really bought to life by the light box. With the light making different shades in the paper, the work from ATV finding colour in glass came to mind in this task, with the different tones in what would usually be a flat colour.
Exercise 6 Tearing
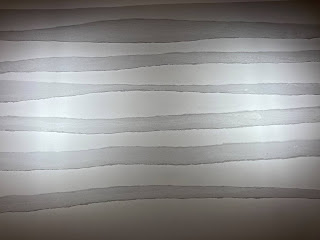
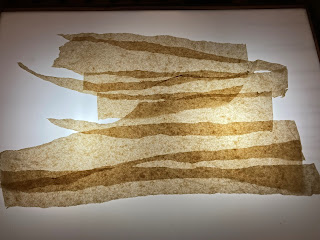
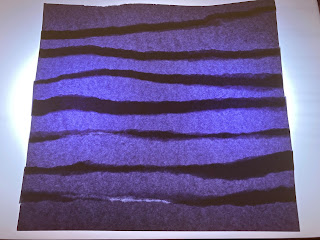
Taking tracing paper, watercolour paper, cellophane, parcel paper and photo paper. Making a selection of samples using different tearing techniques. From slow controlled tears, creating more precise even strips. Whereas the quick more loosely held created more erratic strips, which actually I preferred as it was more visually appealing. Layering the strips up and then shining the light through then made the samples look like rippling water.
The thinner papers like the tracing paper and parcel paper made the more effective sample out of the samples created. Using the cellophane it was impossible to tear it just crumpled, so instead I resorted to doing a small cut and then tearing the cellophane.
The difference I found between tearing and cutting was the lack of control with tearing. I can't decide if I prefer the uniqueness from the tearing or the accurate cuts. I suppose it would all depend on the overall look of the piece you were aiming to create.
Taking some of the cutting methods and using the tearing techniques instead. It created more organic lines but I'm not sure that most of them were an improvement. The only sample I found was improved was the tracing paper, using the erratic tears and making the flaps fold up in an erratic fashion. This sample was astatically pleasing and something I would consider developing further in different materials.














No comments:
Post a Comment