Exercise 1 Fusing Plastic
Taking a selection of different coloured plastic and of varying thicknesses, I began fusing the layers together. What I liked about the layering was the rough edges, exposing the different layers. I then began tackling cutting and stitching into the layered plastic. Using the techniques from the previous exercise cutting rectangle and flaps. Cutting through a couple of the layers but not the whole way through. Exposing one of the layers.
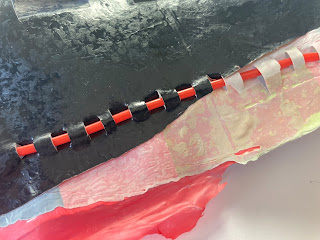
I wanted to keep with the theme, choosing to stitch with plastic wire casing. Cutting slits to stitch into, using various stitches. I'm not sure its aesthetically pleasing, and on reflection I wish I had developed this sample more looking at machine stitch and created more of a design.
I began by collecting a selection of plastics, looking for larger pieces with transparent qualities. And then began collecting plastics, papers, and other found objects to trap inside. Its exercises like these that I'm pleased I have learnt along my learning journey to keep things I feel may be useful. As they were useful for this task!
For my first sample I took sheets of cellophane to capture strips of helium. Using the tearing techniques from the previous exercise, using quick tearing movements. I also added some shimmery fibres to the sample to add some more depth the vast cellophane. I also thought it would develop the colour palette of the piece further.
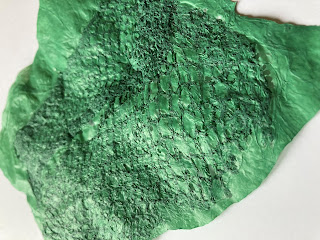
For the next example I tried focus more on texture rather than colour. Using tracing again ripped into strips. I was unsure on what was going to happen but decided to hold the iron on for a bit longer. Using the same cellophane as the previous sample. The crumple of the cellophane was a lot more severe with the extra heat. Causing the texture of elephant skin across the plastic and in some area the tracing paper was came through the cellophane creating even more texture. Looking at the two samples I much prefer the effect of the increased heat.
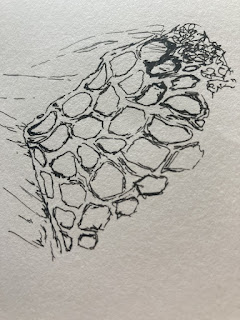
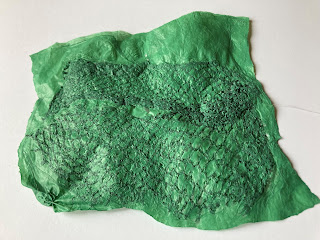
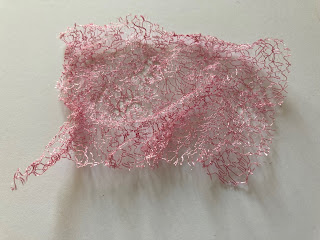
I then set about making a series of samples, using other found items. I liked the way the fruit netting reacted with heat. Shrinking and melting within its cellophane casing. Not only creating texture but also visually interesting and unique.
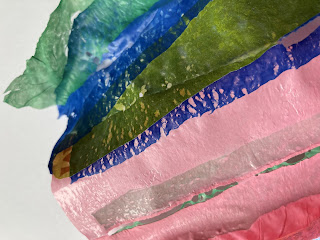
Next I wanted to explore colour, taking strips of carrier bags and cellophane and fused them together with the heat. What I found interesting was that due to the thickness or type of plastic it changed the way the it reacted to the heat. Some melting quicker than others, creating sections with holes and some that looked untouched.
Using colour again, this time using old sweet wrappers. Using bubble wrap this time to trap the wrappers inside. I wanted to the bubbles to create a visually interesting pattern over the top of the colour. On reflection I wish I had held the heat on the sample longer which would have burst and possibly creased like the cellophane.
For the next sample I wanted to try using more heat and trapping something more unusual. I had some ring pulls I thought the plastic would melt around the ring pulls and trap them. Instead the red cellophane wouldn't melt. I didn't matter how much heat I put on it, it was still resistant. Instead this created a pocket allowing contents to move around freely inside. This could work well for some designs and was an interesting accident.
After discovering that the coloured cellophane did not react to the heat. I wanted to see how it would react with a layering it between the clear cellophane. I knew from the previous samples that the cellophane reacted well with the heat. And also incorporating a larger style bubble wrap which reacted better with the heat than the previous one.

Using a couple of different techniques to produce strips of plastic. Cutting pieces neatly and in an organised fashion. Then ripping the bags up into strips and then placing it in random places. This is my preferred sample the crinkled edges and holes caused by the heat. The final sample were two strips of bags entwinned together and then heated up. Unfortunately the effect I was hoping to achieve was not there as the bags I chose to use were thin and reacted quickly with the heat and became very tight like the piece of rope.
Exercise 2 Using a Heat Gun
Having used a heat gun in previous work I was familiar with how it reacted to some material. Specifically more synthetic fabric, I had used it a small amount with plastics but had not explored the material fully. Taking a selection of plastics from thin carrier bags to the thick plastic from a water bottle. I particularly like the way the carrier bags and cellophane work, rippling up and making a bubbling effect. Which created wonderfully unique patterns with the light box behind the sample.
The pieces of plastic water bottle reacted in a different way to what I expected. I thought the heat gun would be less effective on the thicker plastic, but it must have a higher melting point than I thought. The plastic began to curl at the edges, creating interesting curved shapes. What I like about the heating methods is the uniqueness each sample has and the somewhat unknown way the materials would react. One material I found that did not react to the heat at all was the coloured cellophane, which I was surprised at as thought it would. I wonder if it has a coating that stops it from melting?
The fabrics worked in a similar way to the plastics, rippling and crumpling under the heat. What was a challenge with using a heat gun was keeping the material in place. The fan meant it was more difficult to be accurate with the heat. I think this is why the fabric had a more wavy effect under the heat gun.
Again the thinner synthetic material reacted best under heat. I was a little surprised it did not create holes as when I have used a heat gun with a similar fabric in the past it had reacted a lot quicker and created holes. Perhaps the fabric I had used previously had been more synthetic than the one used this time?
There were a few fabrics which had no reaction whatsoever to the heat gun. I had purchased some satin acetate jacquard polyester, chiffon sheer polyester and I had an off-cut of my old curtains. None of these reacted to the heat. I would like to investigate this further in the future at to why some fabrics react and others do not.
Exercise 3 Using hot water
Using hot water to manipulate fabric is a technique I am very fond of using, I love the way that you create different shapes which are held in the fabric. Often creating pieces that remind me of creatures you would find under the sea.
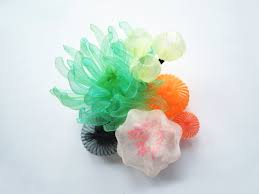
There is one artist that has always inspired me when it has come to this type of fabric manipulation artist Mariko Kusumoto, her work fascinates me it looks so delicate but you just want to touch it. I've often wondered how she manages to create the shapes in the fabrics.
Selecting a collection of fabric to work with and a selection of interesting shapes to mould the fabric around. Choosing a selection of calico, organza and synthetic satin fabric. And using a selection of beads, buttons, marbles and blocks.
The first mistake I made was using my daughters loom bands to wrap around the shapes which I now realise although they are like elastic bands they do not like the heat and will break. This meant that the fist samples needed to be repeated as the buttons etc. had become loose.
As you can see below for the samples created they all worked really well, I prefer the ones in the neutral colours like the thinner calico sample. As it is easier to see the defined shapes and holds some transparency with the light box behind. Making it even more visually interesting. I think the less busy the fabric the more of a feature the shapes become.
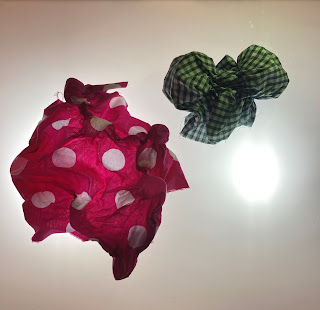
I had used plain fabric to manipulate with heat. I wanted to explore how this technique would look with patterned material. Choosing a gingham fabric to heat up about square blocks and polka dot fabric around marbles. What I observed from these samples is that the shapes are lost within the patterned fabric making the effect less effective.

















No comments:
Post a Comment